I've wanted to learn the Hebrew language for some time and I've had an on-again-off-again experience with it. I just get so far and then slack off for a while so it's back to review time and time again. I've come up with a project that might be an answer to my dilemma and one that might inspire a reader or two.
I'm sure you've seen those colorful, plastic letters with magnets on them. You know...the ones that children like to play with on the door of the refrigerator. These magnetic letters are available in Hebrew but bright, primary colors and plastic are not my favorite form of decor so I've devised my own version of Hebrew letters. While attempting to find material in my own stash of supplies, I've gone back to good old felt.
First I made simple block letter templates of cardstock.
I decided on what word I would spell out first...shofar. I cut out the appropriate size background felt for my letters...white. But because my refrigerator, where I would be displaying my word is white, I decided to place the white background onto a larger piece of green felt. That would make each letter stand out better. I cut out both the white and the green felt with pinking shears to give it some character.
I traced each letter onto the white felt and outlined it with embroidery thread. Then I cut out a less full letter of the green felt to apply inside the outline. Lastly I glued sheet magnet to the back of each letter.
The letters progress until...
I haven't completed all of the letters I will need to spell out words in the future but I will add them until I have enough to do the job.
The finished word 'shofar'.
Each week I'll post a new word or two. Because I am often passing by the fridge I can't help but have the word posted implanted in my memory.
As I was composing this post I realized that I forgot to add the vowel marks to this word. I will add them next week and connect the word shofar to that post.
And what is a shofar you ask? According to Wikipedia, a shofar is a horn, traditionally that of a ram, and used for Jewish religious purposes. But that only scratches the surface of the matter. Come back next week and see how this applies to the Fall Feasts.
A blog providing a resource for sharing ideas, patterns, links, etc. with artists and craftspeople returning from the Nations and walking in the principles and instructions of the first five books of the Bible, the Torah, and who want to incorporate their faith into their creations.
Showing posts with label letters. Show all posts
Thursday, August 22, 2013
Thursday, August 15, 2013
This Little Tune Kept Going Through My Head...
...and I had to act on it. This week's project is the name of our beloved Tzion spelled out in a display.
First I drew my chosen letters on mat board and cut two of each out using a straight edge and an craft knife. I also cut the same shapes out of thin (1/4 inch) styrofoam that was came in packing material. I proceeded to glue together each letter sandwich style...a set of two letters with the styrofoam in between.
| Raw materials |
![]() |
| The letters cut out. |
![]() |
| Sandwiched layers. |
| You can see the gold ribbon trimming the edge of the letters. |
I ran out of gold ribbon and trimmed the edge of the base another trim instead. It seems to work.
I've seen tutorials on making 3D cardboard letters but this method went a lot faster.
I hope you enjoy the following YouTube video...a song about Tzion.
Thursday, August 1, 2013
A Simple Little Key Fob
This idea came to me earlier in the week and I found it pretty quick to accomplish. I started with a pattern drawn on card stock and cut out. I find that card stock, being a little heavier than regular paper holds up better for patterns.
Next a piece of wool felt was selected on which I traced around the pattern with a felt tip pen. Then the felt was cut out.
Each key fob was inserted through a metal keyring and folded in half on itself. Heat fusible webbing was placed between the two layers and set by using a hot and dry iron. Each was decorated differently.
In the first example I used a stencil to outline the letters I wanted to use on a contrasting color of felt. I cut them out and glued them to surface of the key fob. Then the letters were outlined with a bottle of glitter writer I had in my stash of supplies.
In the next example I embroidered my Hebrew name on what was to be the back of key fob before I bonded the front and back together.
This is the front of my name key fob where I used the first letter of my Hebrew name. It was attached in the same manner as the first key fob. (Please excuse the color outlining the letter. It is glittery and the color is much better than what the camera shows.)
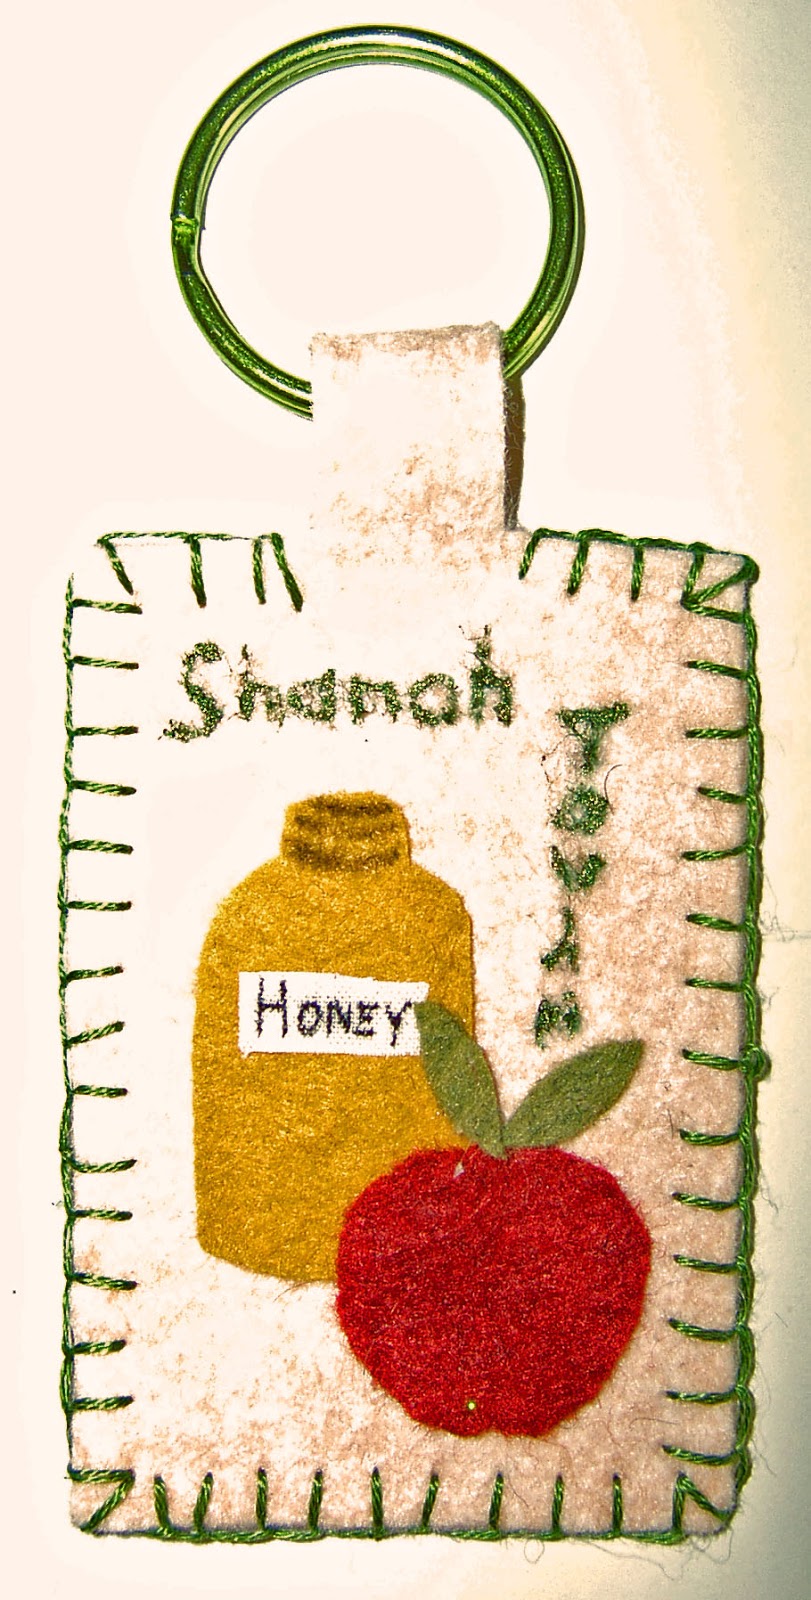
My last key fob was the most fun to make. Rosh Hashanah (New Years) extends from sundown on September 4 through 6 this year and heralds the soon coming Fall Feasts. Already I have been thinking about projects for the Fall Feasts so this one is getting me in the right mindset.
And there you have all three examples. Let your imagine run wild and try these yourself. They're a great little gift idea too.
Next a piece of wool felt was selected on which I traced around the pattern with a felt tip pen. Then the felt was cut out.
Each key fob was inserted through a metal keyring and folded in half on itself. Heat fusible webbing was placed between the two layers and set by using a hot and dry iron. Each was decorated differently.
In the first example I used a stencil to outline the letters I wanted to use on a contrasting color of felt. I cut them out and glued them to surface of the key fob. Then the letters were outlined with a bottle of glitter writer I had in my stash of supplies.
In the next example I embroidered my Hebrew name on what was to be the back of key fob before I bonded the front and back together.
![]() |
| The back |
My last key fob was the most fun to make. Rosh Hashanah (New Years) extends from sundown on September 4 through 6 this year and heralds the soon coming Fall Feasts. Already I have been thinking about projects for the Fall Feasts so this one is getting me in the right mindset.
And there you have all three examples. Let your imagine run wild and try these yourself. They're a great little gift idea too.
Thursday, June 20, 2013
Another Way To Learn Your Hebrew Letters
I found this wonderful bright fabric at 1-800-Driedel.com and couldn't resist purchasing a small amount to play with.
After it sat in my fabric stash for a time, I decided it would suit the border of a table runner. I drafted and assembled three simple blocks, added the border and machine quilted the runner.
I wanted to post this on time but I'm out of steam tonight and am not going to get it finished for the posting. The only thing I have left to do is put the binding on.
And just think. With this runner on the kitchen table I can study my Hebrew letters while I dine.
After it sat in my fabric stash for a time, I decided it would suit the border of a table runner. I drafted and assembled three simple blocks, added the border and machine quilted the runner.
I wanted to post this on time but I'm out of steam tonight and am not going to get it finished for the posting. The only thing I have left to do is put the binding on.
Thursday, February 14, 2013
Gifts To Share
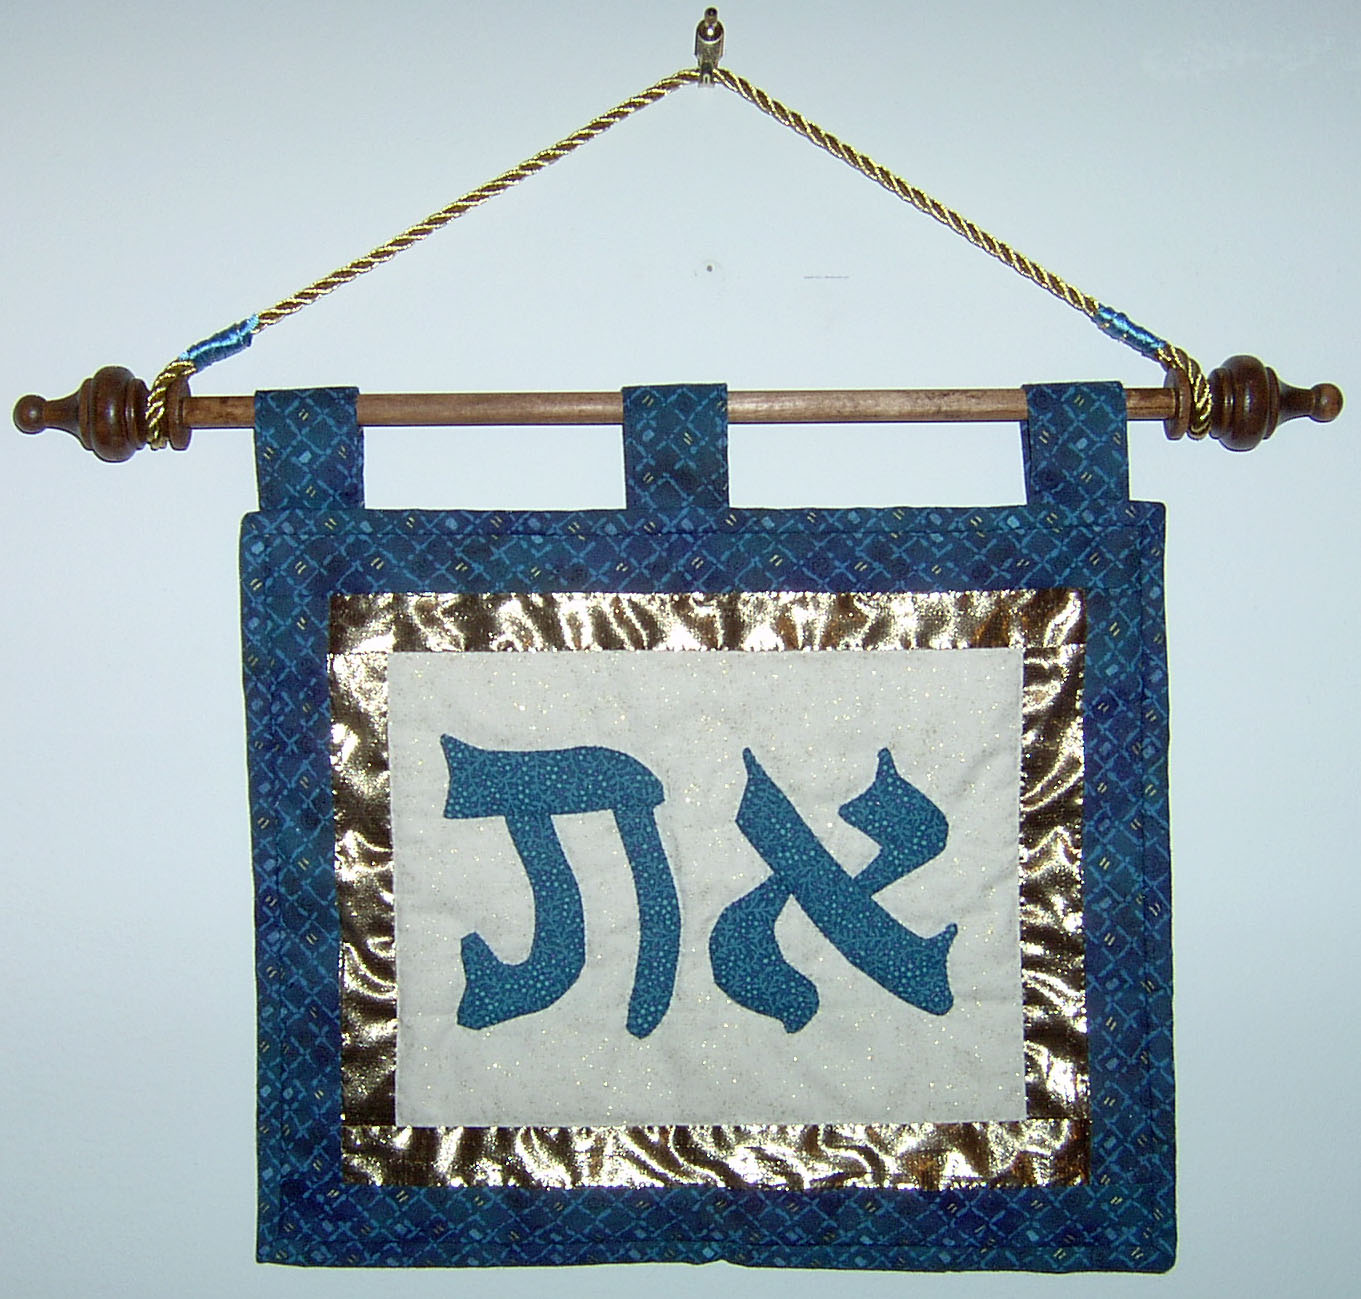
I thought I would share with you today a past Hanukkah gift I made for a friend and one she made for me. The following is the prototype of a wall hanging I made for my friend Ivy. The one she possesses is a very close twin to mine. It is hand appliqued and the shiny fabric is gold lame. I've also used this as a profile picture on different accounts that I have. It is of the Alef Tav, the first and last letters of the Hebrew alphabet. Did you know that the Alef Tav is found in the original Scriptures 7300 times?
In turn, My friend sent me this lovely bracelet she made. I can tell you that the blue beads are made of some sort of semiprecious stone and the beads, Alef and Tav, are sterling silver. These sterling silver Hebrew alphabet beads are available at http://www.yalyjudaica.com/wholesale/beads_2.htm
![]() |
| This is proudly hung in our livingroom. |
Subscribe to:
Posts (Atom)