So many times the projects I post I think are 'duds' but I post them anyways hoping that someone might pick up on it and develop a better idea. But this time I think I've hit the bull's eye! If you've seen some of my last entries you would have seen my ideas for Zedakah boxes. First there was just a gift box I purchased from the dollar store, then I came up with a cocoa box that I decorated. But finally, after these trials and errors, I've come up with a Zedakah box that satisfies my creative hands.
I purchased an unfinished wooden box with a swing lid from the craft store (cost= $1. I love these bargains. Don't you?) and a wooden Star of David cutout (on clearance but can't remember the price).
I proceeded to lightly sand the box then wiped a thinned coat of craft paint on it with some cheesecloth. I was trying to allow the wood grain show through for a little rustic touch. Next I coated the box with acrylic varnish. Fancy ribbon was applied around the sides of the box and the wooden Star of David was glued on top.
I am thrilled with the outcome. What do you think?
A blog providing a resource for sharing ideas, patterns, links, etc. with artists and craftspeople returning from the Nations and walking in the principles and instructions of the first five books of the Bible, the Torah, and who want to incorporate their faith into their creations.
Showing posts with label paint. Show all posts
Thursday, May 23, 2013
Tuesday, May 21, 2013
A Tutorial On Making Your Own Stamps
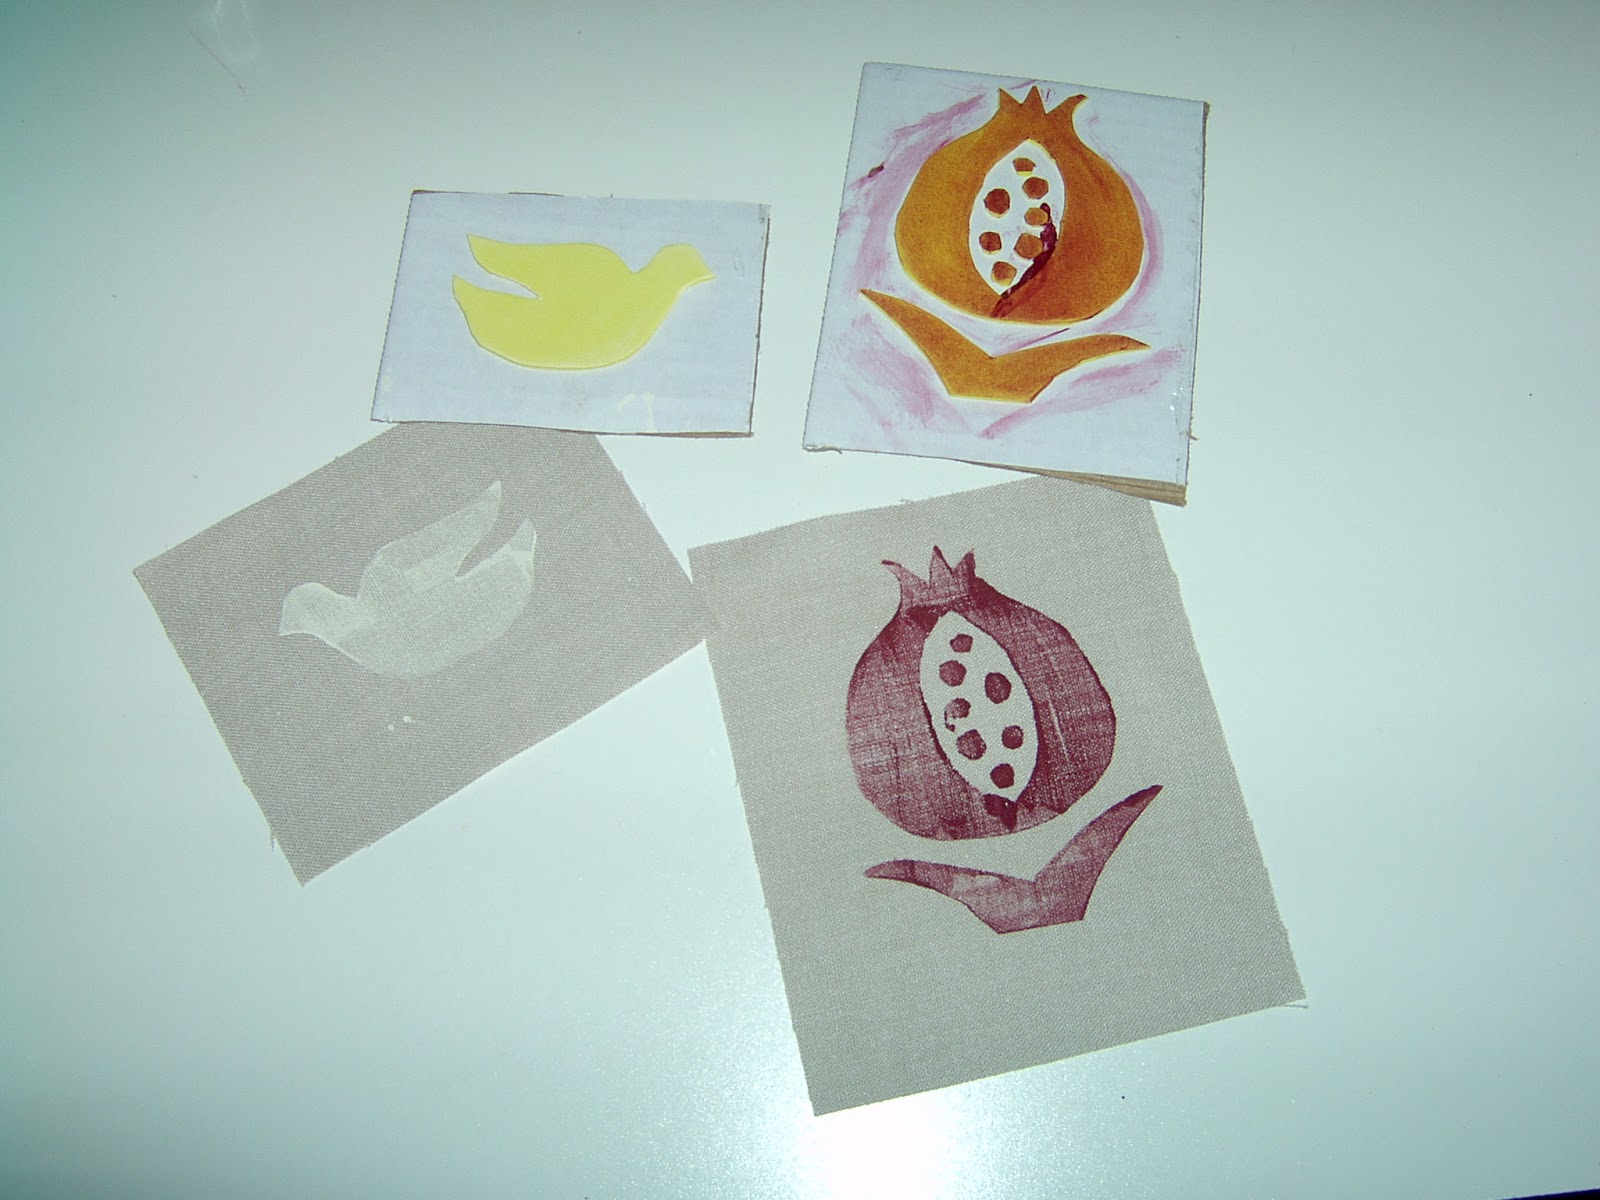
Two years ago or so I was a member of an artist's forum and saw another member's artwork that she created using stamps she had made herself. Upon inquiring how she did it, she shared the easy construction method with me. I'm sorry say that I can't remember the name of the forum or the artist in order to give them credit for the instructions.
The supplies you will need for this project are drawing paper (if you are going to create your own design...but if not, check out the childrens' coloring books I mentioned in a previous post to use for your design), tracing paper, a pencil, scrap cardboard,a small brayer, a flat surface to spread paint on, craft paint and sticky backed craft foam from the craft store.
First draw your design with a heavy enough line that you can see it clearly through tracing paper. Then lay a piece of tracing paper over it and trace.
After you've traced your design transfer it to the back of your sticky back craft foam. You can either use graph paper to transfer the design with. Or you can use my method which is cheap and easy. I merely trace on the back of the tracing with a heavy pencil and turn it over. I then proceed to retrace it with a stylus or empty ball point pen. Remember that what you trace onto the back of the craft foam will be the opposite image of your tracing. For instance, if you want to trace letters make sure you trace it backwards on the back of your craft foam.
The next step is to cut out your shape.
Next cut a piece of scrap cardboard that your shape will fit into. Peel off the backing of the foam and place on the cardboard backing.
Now you're ready to print. Whether using paper or cloth to print onto I recommend practicing which, in this case, I didn't do. (A little shame-faced here.)
Pour out a good amount of paint onto a flat surface (you can use waxed paper taped down to the table). Then roll your brayer back and forth through the paint, enough to coat the brayer evenly. Roll the paint ladened breyer over your stamp. Turn the stamp over and carefully place it on the surface you are printing on. Press down evenly all over the stamp. Lift up and there you have it...a finished print.
I started adding a bit of stitchery to my prints to start to liven them up. Just think where one could go with this.
I've only just begun (as the song goes). I could use these in a little wall quilt, the cover of a needlebook, a pin cushion. an applique on a tee shirt. The possibilities are endless!
The supplies you will need for this project are drawing paper (if you are going to create your own design...but if not, check out the childrens' coloring books I mentioned in a previous post to use for your design), tracing paper, a pencil, scrap cardboard,a small brayer, a flat surface to spread paint on, craft paint and sticky backed craft foam from the craft store.
First draw your design with a heavy enough line that you can see it clearly through tracing paper. Then lay a piece of tracing paper over it and trace.
After you've traced your design transfer it to the back of your sticky back craft foam. You can either use graph paper to transfer the design with. Or you can use my method which is cheap and easy. I merely trace on the back of the tracing with a heavy pencil and turn it over. I then proceed to retrace it with a stylus or empty ball point pen. Remember that what you trace onto the back of the craft foam will be the opposite image of your tracing. For instance, if you want to trace letters make sure you trace it backwards on the back of your craft foam.
The next step is to cut out your shape.
Next cut a piece of scrap cardboard that your shape will fit into. Peel off the backing of the foam and place on the cardboard backing.
Now you're ready to print. Whether using paper or cloth to print onto I recommend practicing which, in this case, I didn't do. (A little shame-faced here.)
Pour out a good amount of paint onto a flat surface (you can use waxed paper taped down to the table). Then roll your brayer back and forth through the paint, enough to coat the brayer evenly. Roll the paint ladened breyer over your stamp. Turn the stamp over and carefully place it on the surface you are printing on. Press down evenly all over the stamp. Lift up and there you have it...a finished print.
I started adding a bit of stitchery to my prints to start to liven them up. Just think where one could go with this.
I've only just begun (as the song goes). I could use these in a little wall quilt, the cover of a needlebook, a pin cushion. an applique on a tee shirt. The possibilities are endless!
Thursday, May 2, 2013
Hebrew Crafting In The Garden
Hi everyone! With the start of spring weather in my area it's time to get outside and take Hebrew crafting to the garden. I not only do all kinds of crafting I am also enjoy making art. In looking in one of my sketchbooks I found the perfect sketch to use on a garden flag. My scanner is down so I won't be able to show you the original sketch.
I made the flag out of outdoor canvas that I purchased from the fabric store. I then cut it to size to fit a garden flag holder that I purchased from the craft store adding enough to my measurement for a simple hem and a rod pocket. Make sure you have enough of a rod pocket to go over that flag holder. This fabric won't fray so you only have to fold it once for each the hem and the rod pocket. I used a heavier needle on my sewing machine for this along with s good strong thread. Note: For non-sewers I have in the past suggested that you use a heat set bonding tape but that WON'T WORK on this project. If you try to iron this fabric it will pucker. So I recommend that you use a glue that is NOT water soluble to cement your rod pocket and hem. Creating the hem adds a little weight to the bottom so your flag will hang better.
After you have constructed your flag it's time to decide on a design. If you aren't an artist I suggest looking at children's coloring books. They can be a great resource for designs. Or better yet, use a drawing that your child has made for inspiration. After tracing your design on tracing paper you can transfer your design onto the front of your flag either by using graphite transfer paper or simply by turning your tracing on the backside and going over the outline with a soft pencil. Turn your paper over and lay it on top of your flag. Tape it down and proceed to trace over your lines with an empty ballpoint pen or a stylist. Before removing your tracing paper check to see if the lines have transferred to the canvas. Adjust and retrace if needed.
Now onto the painting where the fun really comes in. I used acrylic craft paint to fill in my design, even mixing some of my colors to get just what I wanted. This fabric is rather stiff and doesn't need any preparation to paint on. Adding Scripture made my flag complete.
I'm thinking of starting a Flickr group in the future when I get enough response and followers. Then my readers can share the projects they have made from ideas they find on this blog.
I made the flag out of outdoor canvas that I purchased from the fabric store. I then cut it to size to fit a garden flag holder that I purchased from the craft store adding enough to my measurement for a simple hem and a rod pocket. Make sure you have enough of a rod pocket to go over that flag holder. This fabric won't fray so you only have to fold it once for each the hem and the rod pocket. I used a heavier needle on my sewing machine for this along with s good strong thread. Note: For non-sewers I have in the past suggested that you use a heat set bonding tape but that WON'T WORK on this project. If you try to iron this fabric it will pucker. So I recommend that you use a glue that is NOT water soluble to cement your rod pocket and hem. Creating the hem adds a little weight to the bottom so your flag will hang better.
After you have constructed your flag it's time to decide on a design. If you aren't an artist I suggest looking at children's coloring books. They can be a great resource for designs. Or better yet, use a drawing that your child has made for inspiration. After tracing your design on tracing paper you can transfer your design onto the front of your flag either by using graphite transfer paper or simply by turning your tracing on the backside and going over the outline with a soft pencil. Turn your paper over and lay it on top of your flag. Tape it down and proceed to trace over your lines with an empty ballpoint pen or a stylist. Before removing your tracing paper check to see if the lines have transferred to the canvas. Adjust and retrace if needed.
Now onto the painting where the fun really comes in. I used acrylic craft paint to fill in my design, even mixing some of my colors to get just what I wanted. This fabric is rather stiff and doesn't need any preparation to paint on. Adding Scripture made my flag complete.
I'm thinking of starting a Flickr group in the future when I get enough response and followers. Then my readers can share the projects they have made from ideas they find on this blog.
Subscribe to:
Posts (Atom)