This idea came to me earlier in the week and I found it pretty quick to accomplish. I started with a pattern drawn on card stock and cut out. I find that card stock, being a little heavier than regular paper holds up better for patterns.
Next a piece of wool felt was selected on which I traced around the pattern with a felt tip pen. Then the felt was cut out.
Each key fob was inserted through a metal keyring and folded in half on itself. Heat fusible webbing was placed between the two layers and set by using a hot and dry iron. Each was decorated differently.
In the first example I used a stencil to outline the letters I wanted to use on a contrasting color of felt. I cut them out and glued them to surface of the key fob. Then the letters were outlined with a bottle of glitter writer I had in my stash of supplies.
In the next example I embroidered my Hebrew name on what was to be the back of key fob before I bonded the front and back together.
 |
| The back |
This is the front of my name key fob where I used the first letter of my Hebrew name. It was attached in the same manner as the first key fob. (Please excuse the color outlining the letter. It is glittery and the color is much better than what the camera shows.)
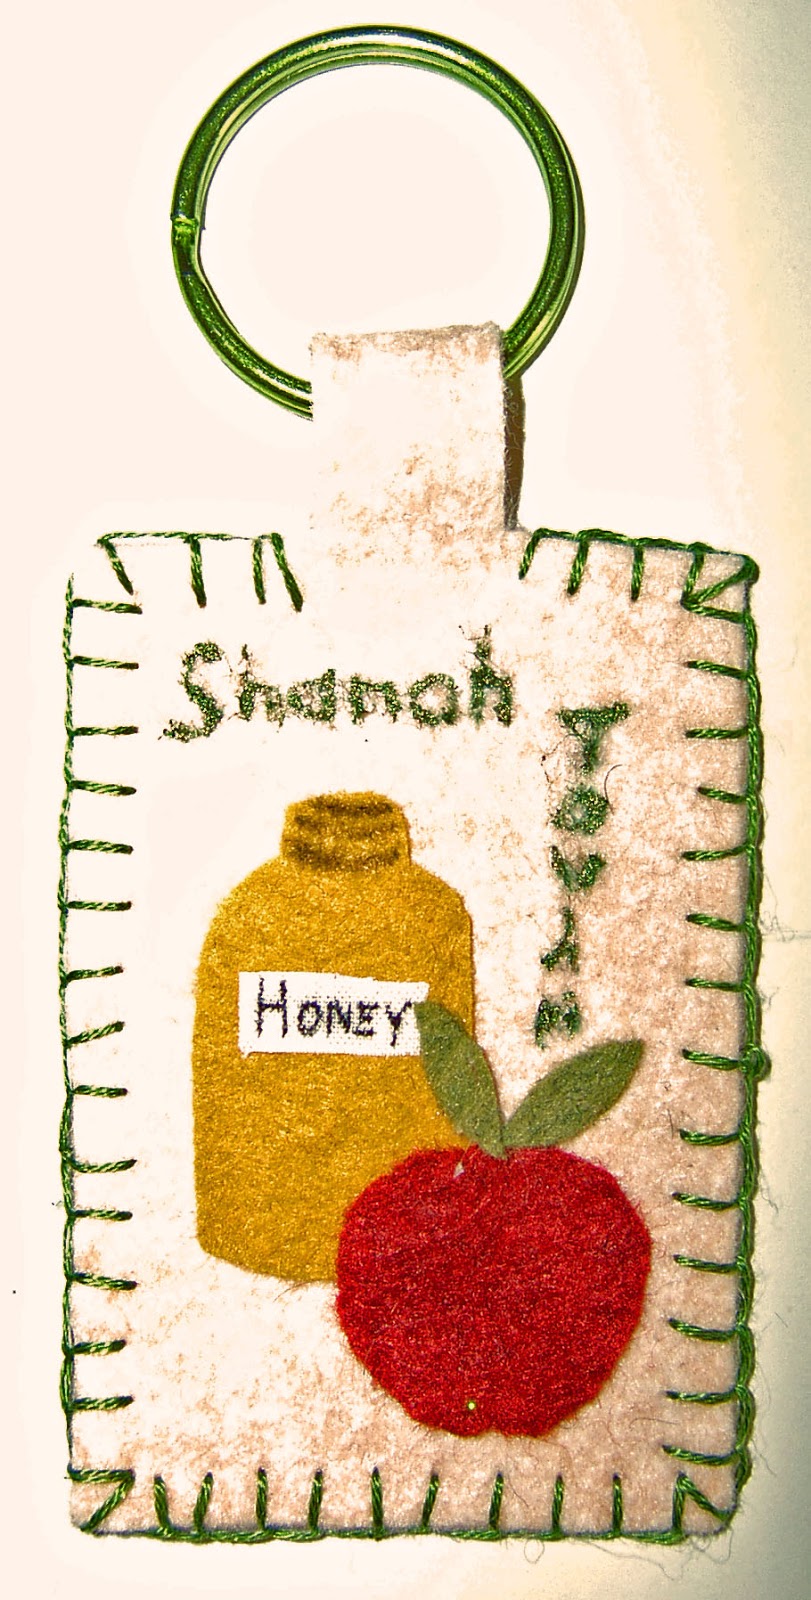
My last key fob was the most fun to make. Rosh Hashanah (New Years) extends from sundown on September 4 through 6 this year and heralds the soon coming Fall Feasts. Already I have been thinking about projects for the Fall Feasts so this one is getting me in the right mindset.
And there you have all three examples. Let your imagine run wild and try these yourself. They're a great little gift idea too.


No comments:
Post a Comment