Thursday, February 28, 2013

Tzedakah

Today I set about to replace my Tzedakah box. I have been using a fabric covered gift box from the dollar store. It was ok in a pinch but not satisfying to me. Looked too much like pagan holiday stuff to me.

In thinking about what I would use to replace it with I could go to the craft store and find something to convert into a Tzedakah box. Or I could go on a scavenger hunt in my studio to find something appropriate.  I had previously saved a cocoa powder box because I liked the shape and this would be perfect to recycle. I took the label off and cleaned up the box.


But how should I decorate it? Then I remembered that I had a couple of wallpaper border rolls in my craft stash. The wallpaper border was even prepasted so all I had to do was wet it and apply. Then I added The word Tzedakah (Hebrew for charity) to the front of the box. I like this one so much better than the first one I used.
I'm still thinking of somehow changing the top but that will wait for another day.


Tuesday, February 26, 2013

Would You Like To Learn Your Name In Hebrew?

When I started this blog it was not for the purpose of beating my chest and drawing attention to myself and saying "Look what I made". My purpose is to encourage you to stretch your imagination and incorporate the Hebrew roots into your creations.

I enjoy surrounding myself with what I've created instead of buying a 'completed' item from a store. Yes, my creations have components from other sources. It goes without saying that I can't manufacture the raw materials that I need, I have to get my supplies somewhere.

Some of the ideas you will see on this blog came from other creative people. Rest assured that I will always give credit and links to those ideas that are not my own.

Today I thought it would be fun to share a link so you may find your name in Hebrew.
http://www.my-hebrew-name.com/list_of_hebrew_names.php
As you notice I have put a box with my Hebrew name Tzfrira previously under my blog banner now at the bottom of my home page. It was tempting to use my middle name which I like better. Maybe I will in the future.

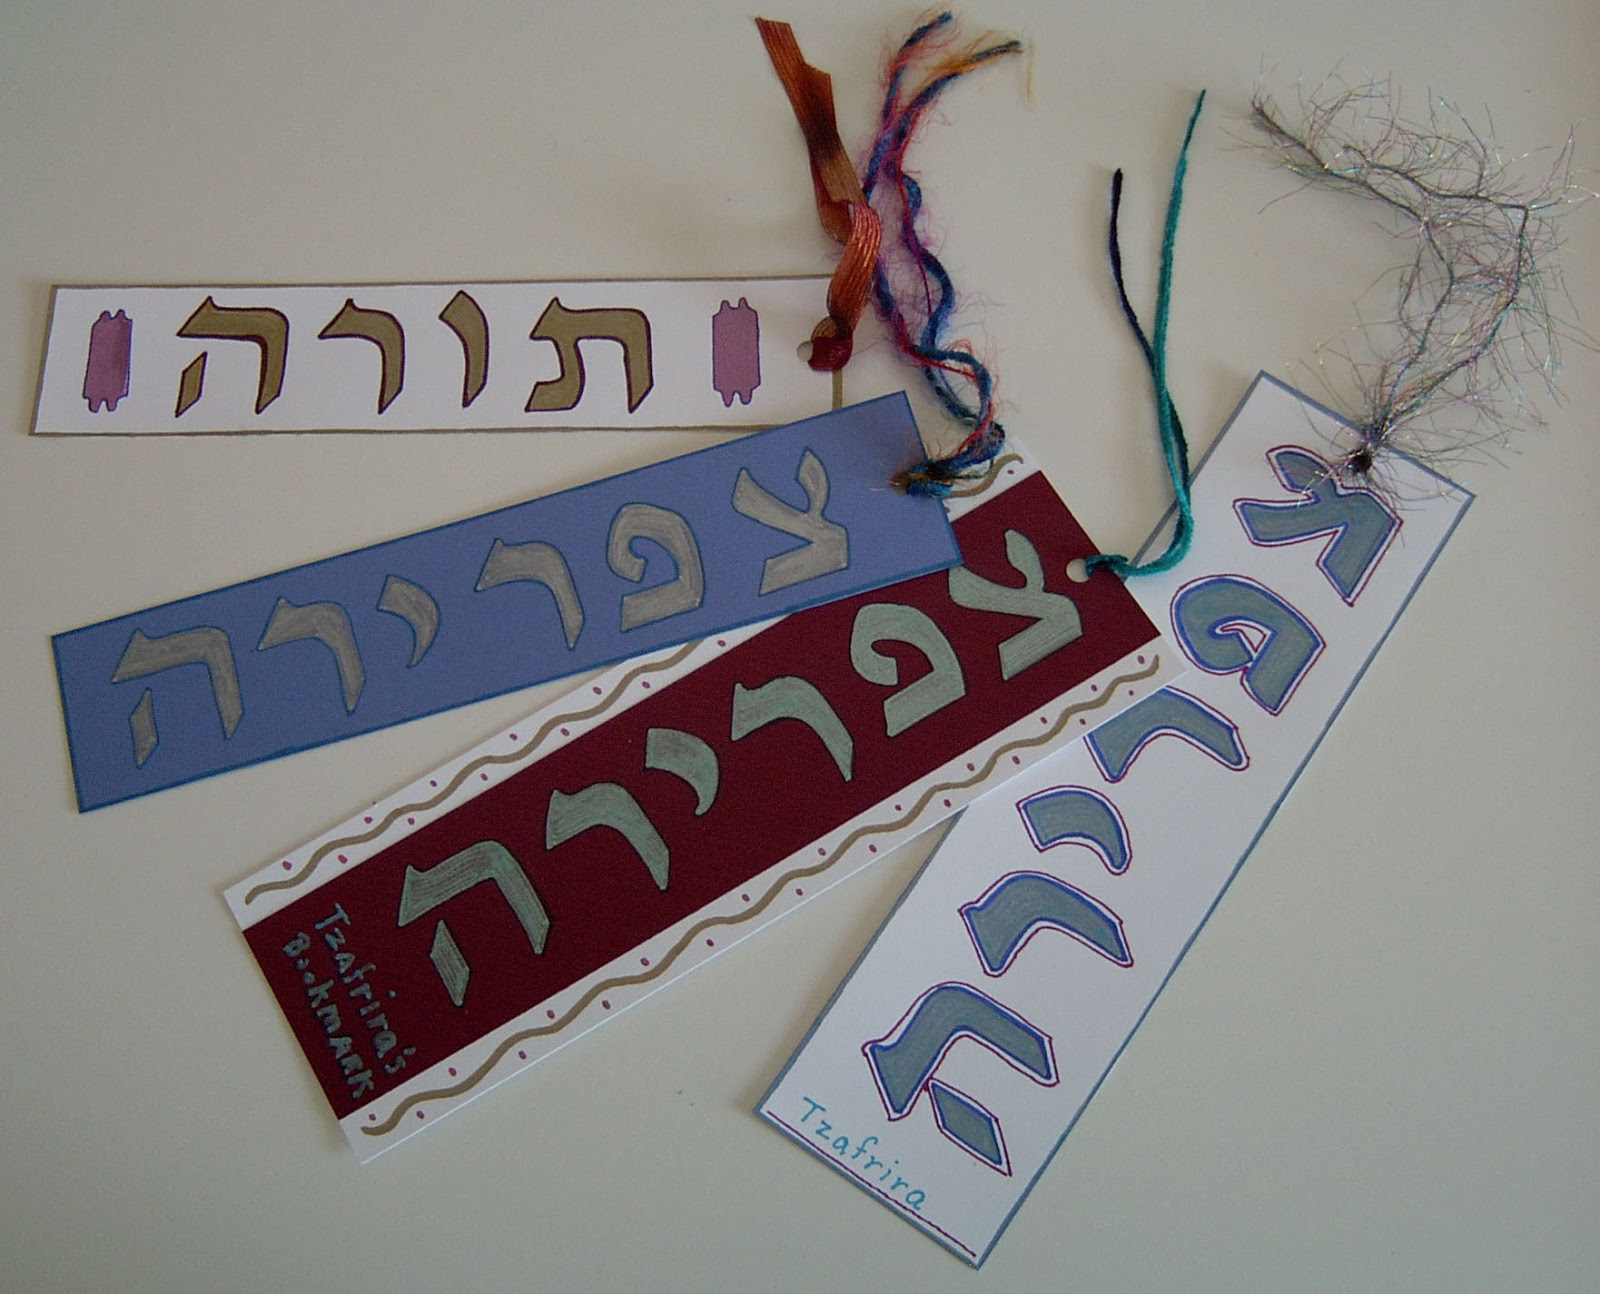
I don't think you ever have enough good bookmarks. I am always getting advertising bookmarks in the mail but they are kind of puny. So I decided to make a few of my own, with my name in Hebrew of course. If you make a number of them, you will likely to remember how to spell your name in Hebrew.
The bookmark on the top of the picture spells Torah. You know in which Book I'll be using this one.
I used cardstock for the bookmarks, a Hebrew letter stencil and color markers. You can find suppliers of Hebrew stencils on my craft supplies links page. Add a ribbon or some yarn for an accent. Another idea is to stencil your Hebrew name on a tee shirt or a tote. The ideas are endless. Have fun with it.

In future posts I will be adding more Hebrew words and sayings to other creations.


Thursday, February 21, 2013

Purim Flavor

Like many others finding their way back to their Hebrew roots, I find myself overwhelmed trying to keep up with the Moadim or Feast Days of YHWH. So I do a little more each year decorating, cooking special foods, etc.

This week brings us the Festival of Purim. It's a victory celebration to commemorate the deliverance of the Jewish people from the evil Haman. The details are found in the Book of Esther. Things that I associate with Purim are masks (hidden), anything with a Persian flavor, crowns (representing Queen Esther), the Megillah (the scroll the Biblical narrative of the Book of Esther), groggers (noisemakers that are used to drown out the name of Haman when the Megillah is read) and, of course, Hamantashen (cookies shaped like Haman's hat).  I am sure I will add to my list in the future.

Since I haven't had any decorations in the past with Purim in mind, I decided to start this year. So, without further ado, I present my first Purim decorations.

Thursday, February 14, 2013

Gifts To Share

I thought I would share with you today a past Hanukkah gift I made for a friend and one she made for me. The following is the prototype of a wall hanging I made for my friend Ivy. The one she possesses is a very close twin to mine. It is hand appliqued and the shiny fabric is gold lame. I've also used this as a profile picture on different accounts that I have. It is of the Alef Tav, the first and last letters of the Hebrew alphabet. Did you know that the Alef Tav is found in the original Scriptures 7300 times?

This is proudly hung in our livingroom.
In turn, My friend sent me this lovely bracelet she made. I can tell you that the blue beads are made of some sort of semiprecious stone and the beads, Alef and Tav, are sterling silver. These sterling silver Hebrew alphabet beads are available at http://www.yalyjudaica.com/wholesale/beads_2.htm


Monday, February 11, 2013

My First Challah Cover

I've found so many pretty and interesting challah covers available on  the internet it's hard to choose one over another. So,of course, I decided to create my own. I had leftover material from other projects so for me the only cost was sewing thread, electricity to run my sewing machine and time to create. Have a look.
Shabbat (in Hebrew letters)
My favorite technique is hand applique but this time I decided to attach the letters by using an iron on webbing. Then I outlined the letters with a gold paint pen.  I've had the lace and gold trim forever in my stash and I have no idea where or why I purchased it, but it was just the right touch to finish it out.

I guess I'll be started a challah cover collection... one for every Feast Day!

Thursday, February 7, 2013

A Menorah In Cross Stitch

A while back I made a cross stitch Menorah from a free pattern at this site: http://crossstitch.about.com/od/patternsfromyourguide/ig/Lighted-Menorah-Pattern/  I had to ponder how to use this pattern and I came up with the following.
Since I am a sewer/quilter I decided to turn this into a wall hanging. Sashing was added to the cross stitch peace as a border. Then ribbon and rick-rack were added as trim and I sewed beads on the purple trim and on the candle tips to mimic flames. Lastly strings of beads were sewn on the top and bottom corners and a ribbon added for a hanger. Before I added any of the beading I sewed a backing onto the front pillow style and turned it right side out. I found that it started to droop when I hung it up so I tacked a shortened skewer on the back to stablize it.

I also made a similar one for a friend. The difference was basically that I added the strings of bead to the bottom left and right corners. This gives the flavor of a tallit to the hanging.

I hope you enjoyed my hangings and that you try making this yourself.

Monday, February 4, 2013

Premier Post

Welcome to my first post. Grab a cup of coffee and sit down and explore the site. I will be posting twice a week, hopefully Mondays and Thursdays, and bringing you ideas to incorporate into your own crafting.
I will be showing you some of the things that I've made to spur your imagination and adding links if they pertain to that project.

The above picture is of a mug rug that I created with patchwork and a bit of embroidery. I'm on a  mission to create and incorporate items that display our faith in our home and to encourage others to do the same.

Future items that I'm planning to share are bookbinding, wall hangings, quilted items, garden crafts, art applications and on and on. Also I will be setting up a Flickr group in the future so readers of this blog can share their ideas and creations.

I've collected links to many other websites over the past few years and have posted them on this blog.  I will continue to add more links as I find them.

Feel free to Pin any of the pictures on this site to Pinterest but be sure to post the link to this site when you pin.